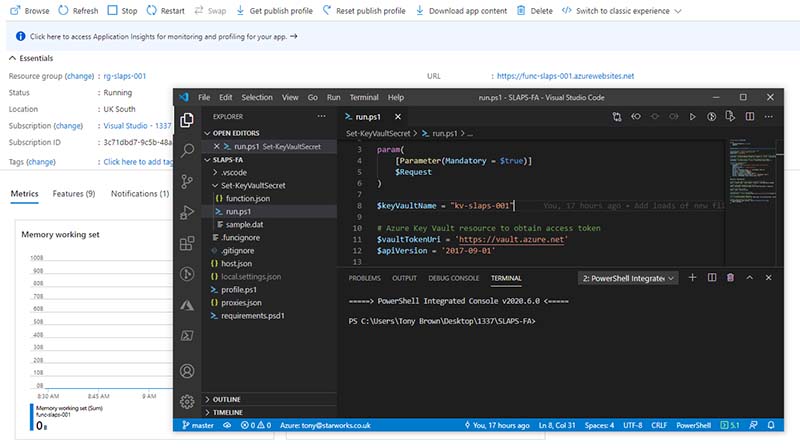
Serverless LAPS with Terraform
There’s no real out of the box solution for local administrator passwords with cloud-based devices. The ‘additional local administrators’ in Intune doesn’t offer a solution to have individual, secure & manageable local administrator passwords.
There is a great solution created byJohn Seerden https://github.com/jseerden/SLAPS, that has been updated by Cloud Boy - https://www.cloud-boy.be/blog/serverless-laps-with-intune-function-app-and-key-vault that offers a great cloud-based solution using an Azure Vault to store the passwords, a function app with a PowerShell script to generate and write the passwords to the vault and Endpoint Manager to deploy a PowerShell script to request a password from the function app and to add / update the local administrator.
This solution works really well, so I’ve written a guide on how to get this setup using IaC / Terraform for those who are so inclined
The installation process is similar, but has a few subtle differences;
- Create the required Azure resources using Terraform
- Create the Azure Vault using Terraform
- Create the Function App using Terraform
- Assign the Function App managed identity to the Azure Vault using Terraform
- Create the Function App in VS Code and publish to the newly created App
- Update & deploy the PowerShell script with Endpoint Manager
Create the basic Azure resources using Terraform
I tend to use a variables.tf file to store my common variables, for this project - we'll add the required resource location, the tenant ID and the ID of the group which requires access to the vault. This file should look like the below;
The variables.tf file
# the tenant ID - can be found in the properties of the azure tenant in portal.azure.com

variable "tenantID" {
 type = string
 description = "The Azure AD tenant ID which you're going to use for the Vault Access Policies"
 default = "123456789-0123-0123-0123-0123456789abce"
 }

 variable "location" {
 type = string
 description = "The location in which to create the Azure Resources"
 default = "uk south"
 }

variable "vaultAccessGroup" {
 type = string
 description = "The objectID of the group which you wish to assign access to the vaults' secrets - can be found in the properties of the group"
 default = "123456789-0123-0123-0123-0123456789abce"
 }
The following is the basic terraform config along with standard resources required for the SLAPS implementation...
terraform {
required_version = ">=0.12"
backend "azurerm" {}
}

resource "azurerm_resource_group" "rg-slaps" {
  name = "rg-slaps-001"
  location = var.location
}

provider "azurerm" {
    environment = "public"
    version = ">= 2.0.0"
    features {}
}

resource "azurerm_storage_account" "sa-slaps" {
  name = "stslaps001"
  resource_group_name = azurerm_resource_group.rg-slaps.name
  location = var.location
  account_tier = "Standard"
  account_replication_type = "LRS"
}
Setup the Function App
Firstly, setup the function app plan..
resource "azurerm_app_service_plan" "plan-slaps-001" {
  name = "plan-slaps-001"
  location = var.location
  resource_group_name = azurerm_resource_group.rg-slaps.name
  kind = "FunctionApp"
  sku {
    tier = "Dynamic"
    size = "Y1"
  }
}
Then the actual Function App
 resource "azurerm_function_app" "func-slaps-001" {
  name = "func-slaps-001"
  location = var.location
  https_only = true
  version = "~3"
  resource_group_name = azurerm_resource_group.rg-slaps.name
  app_service_plan_id = azurerm_app_service_plan.plan-slaps-001.id
  storage_account_name = azurerm_storage_account.sa-slaps.name
  storage_account_access_key = azurerm_storage_account.sa-slaps.primary_access_key
  identity {
      type = "SystemAssigned"
  }

  app_settings = {
    FUNCTIONS_WORKER_RUNTIME = "powershell"
      }
}
Create the Azure Vault
This single code block creates the Azure Vault and also the access policy.
You can see we're using the tenantID that was specified in the variables file, and also that we're discovering the managed identity for the function app to be able to set secrets with the following line...
object_id = "${lookup(azurerm_function_app.func-slaps-001.identity[0],"principal_id")}"
We're also setting an 'allow all networks' ACL on the vault, if you wish to restrict access to particular ranges, set the networks_acls default action to Deny and configure the 'bypass' element to allow the required IP ranges.
resource "azurerm_key_vault" "kv-slaps-001" {
  name = "kv-slaps-001"
  location = var.location
  resource_group_name = azurerm_resource_group.rg-slaps.name
  enabled_for_disk_encryption = true
  tenant_id = var.tenantID
  soft_delete_enabled = true
  soft_delete_retention_days = 7
  purge_protection_enabled = false
  sku_name = "standard"
  access_policy {
    tenant_id = var.TenantID
    object_id = "${lookup(azurerm_function_app.func-slaps-001.identity[0],"principal_id")}"

    key_permissions = [
      "get",
    ]
    secret_permissions = [
      "set",
    ]
    storage_permissions = [
      "get",
    ]
  }

access_policy {
    tenant_id = var.tenantID
    object_id = var.vaultAccessGroup

    key_permissions = [
      "get",
    ]
    secret_permissions = [
      "get","list",
    ]
    storage_permissions = [
      "get",
    ]
  }

  network_acls {
    default_action = "Allow"
    bypass = "AzureServices"
  }
}
Deploying the Function App using VS Code
You should now have your Azure resources all provisioned and ready to go, we now need to get the useful code inside the function app.
We're assuming here that you have VS Code configured with the required plugins, but if you don't you basically need;
- VS Code Installed
- Node.js and NPM installed
- The Azure Functions Extension
- You're logged into Azure with both the functions extension and VS Code
It's worth noting that this deployment doesn't create a pipeline, just an Azure Function App inside VS code that's deployable to the app provisioned in Terraform that you can implement control over if you use GIT. I'll go through creating a function app using a release pipline in another article, but this article focusses on IaC.
Create a folder inside your repo (not your terraform folder though, these don't want to be picked up by terraform) and attach the folder to your workspace.
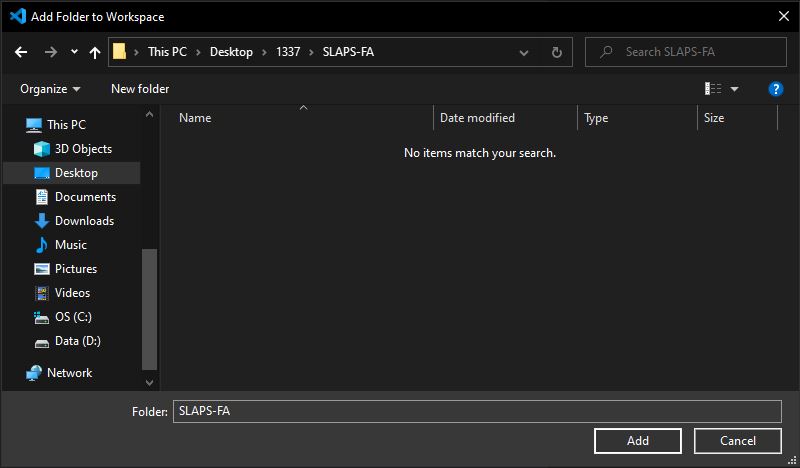
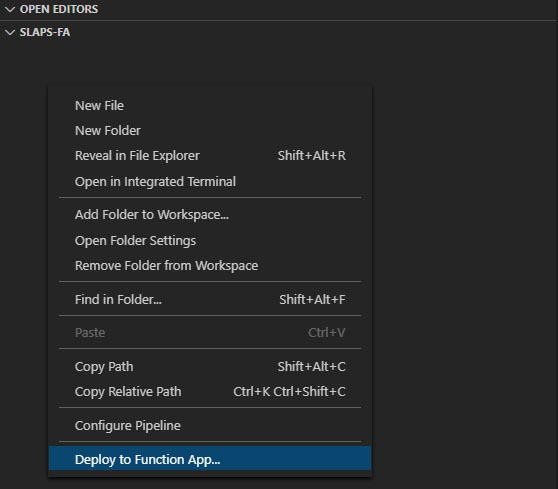
Right click in that folder and select 'Deploy to Function App'
Select your Azure Subscription

Select the function app created in the previous steps

When prompted, select Yes to initialise the project for VS Code
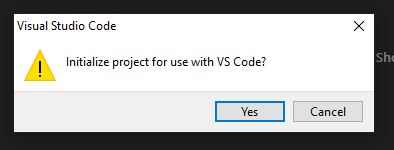
When prompted, click 'Yes' to create a new project

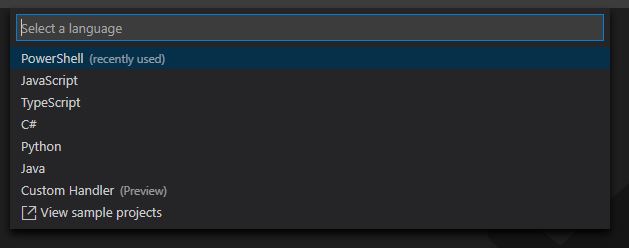
Select PowerShell as the language
Select 'HTTP Trigger' as the template for the project
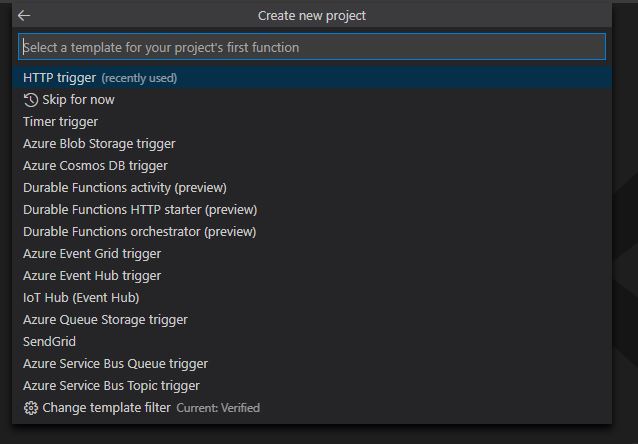
To align with Cloud-Boy's guide, call the funcion 'Set-KeyvaultSecret'

Select 'Function' as the auth level

Click 'Deploy' to overwrite the blank function in Azure

The newly initialised function will deploy to your Function App in Azure - note the info box in the bottom corner

We now have a Function App source in VS Code that's publishable to the Function App created using Terraform in the previous steps. We now need to get the useful 'Set-KeyvaultSecret' code into that function.
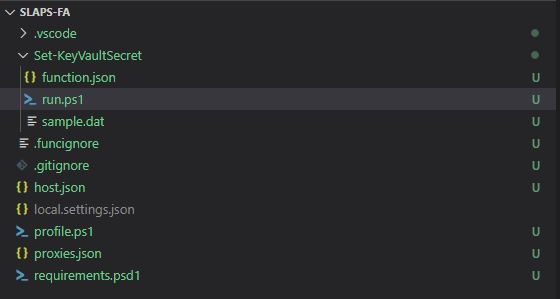
Head over to https://github.com/jseerden/SLAPS and browse to the Powershell Script. Copy the script content and paste it into the run.ps1 file, changing the $keyVaultName to match the vault you created in the previous steps.
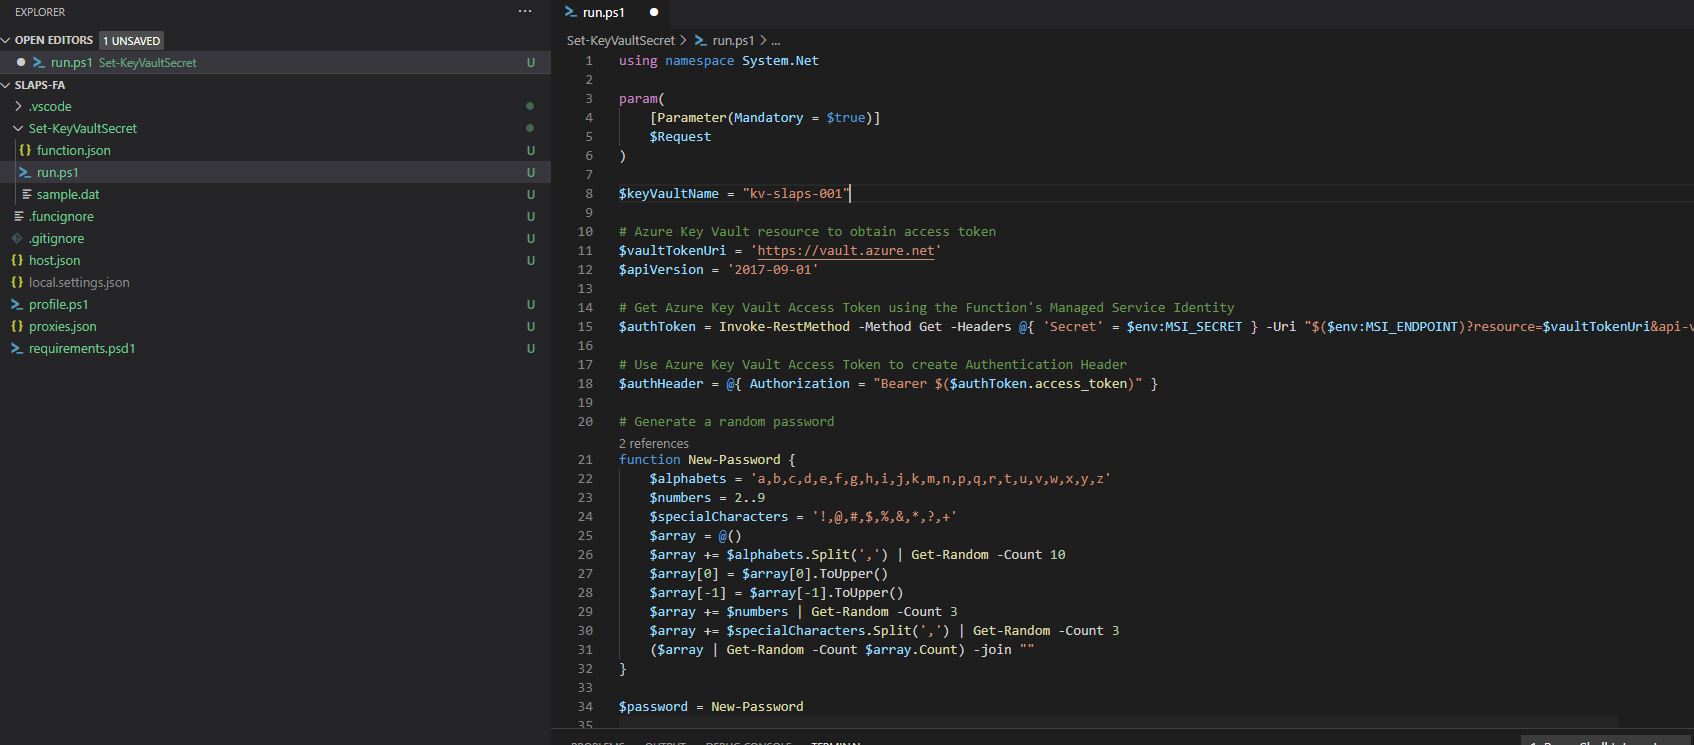
Right click on the Set-KeyVaultSecret folder and deploy the function again
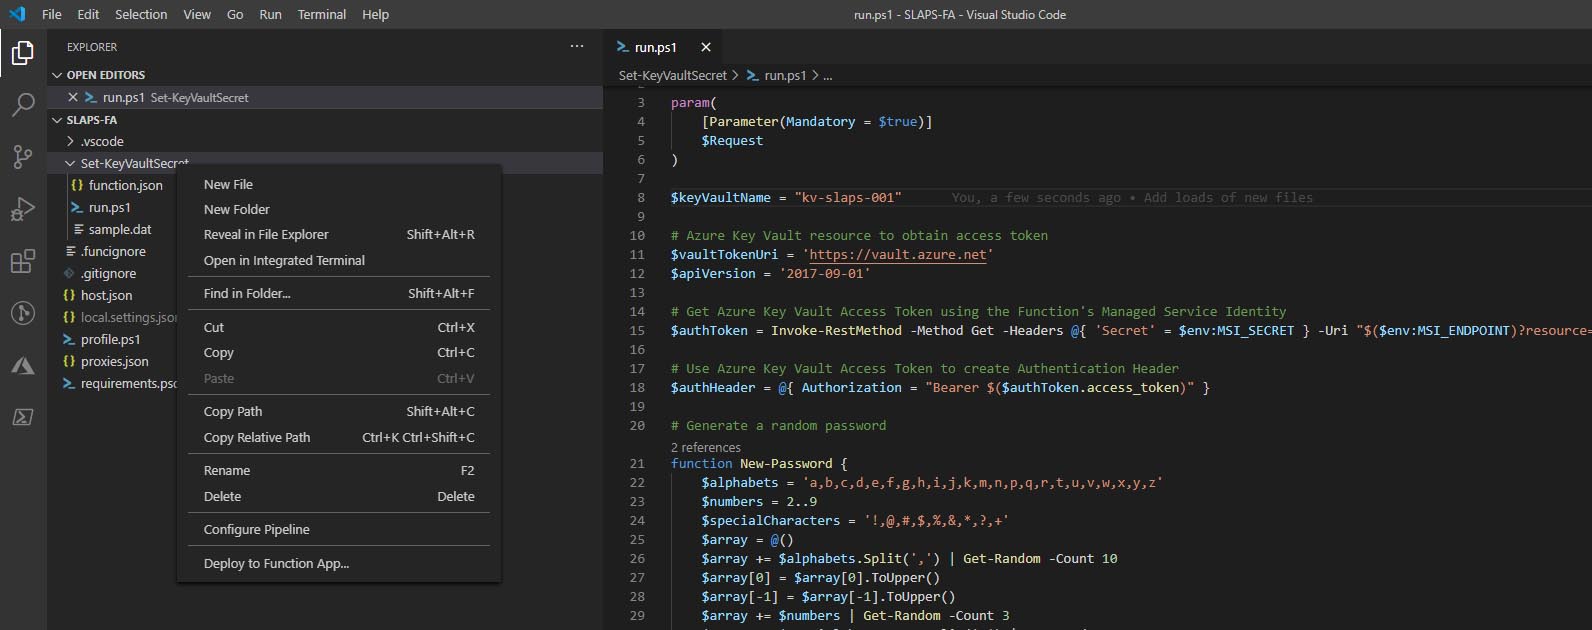
Note in the info box, the app is deploying again, this should succeed again without any drama.

Testing the Function App
You're now ready to test the function, so head over to the GUI and select your Function app, then the function and click on Test/Run. Enter the following to test..
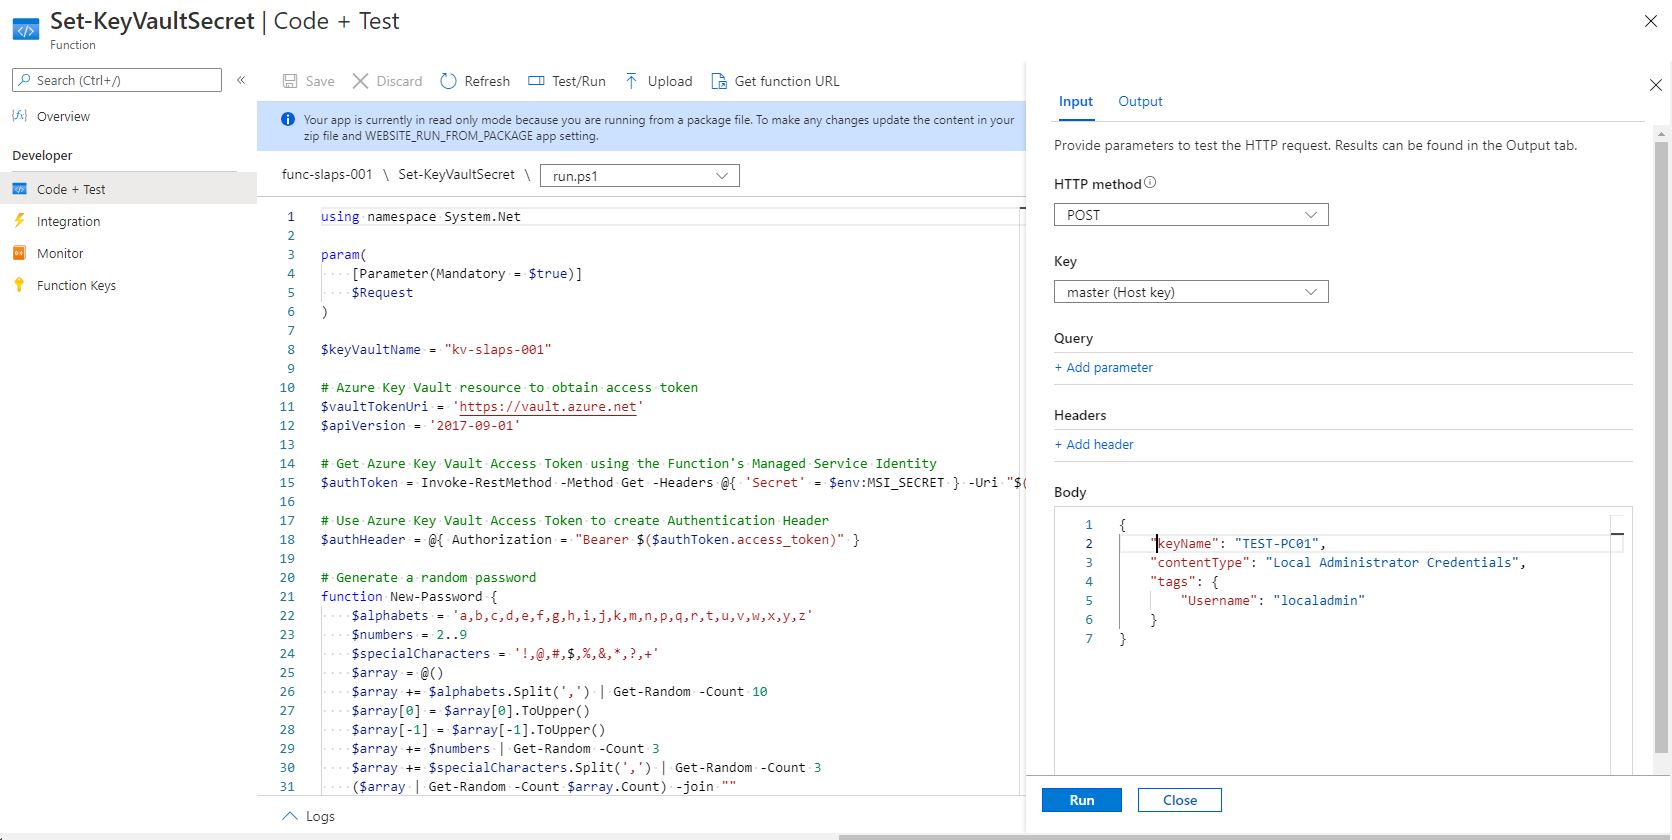
{
    "keyName": "TEST-PC01",
    "contentType": "Local Administrator Credentials",
    "tags": {
        "Username": "localadmin"
    }
}{
"keyName": "TEST-PC01",
"contentType": "Local Administrator Credentials",
"tags": {
"Username": "localadmin"
}
}{
"keyName": "TEST-PC01",
"contentType": "Local Administrator Credentials",
"tags": {
"Username": "localadmin"
}
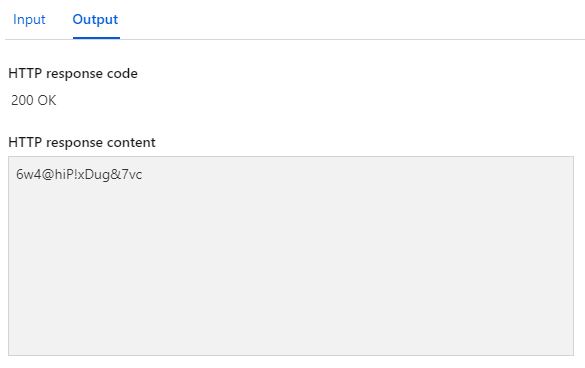
}A secure password should be generated
And the secret stored in the vault
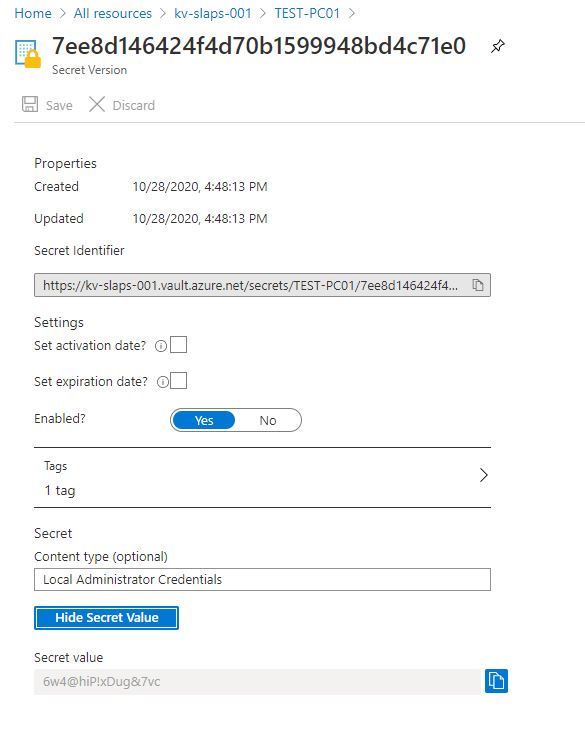
And that's it - the SLAPS back-end configured using VS Code, Terraform and IaC.
You'll now need to head back over to Cloud-Boy's guide and sort the rest of the Endpoint Manager bits out.
at your event, give a workshop or
write an article? This email address is being protected from spambots. You need JavaScript enabled to view it. ✌️
